Blog

Image of jar filled with apple butter and a spoon with apple butter on it.

How to Can Apple Butter – No Added Sugar

This apple butter is absolutely delicious and the best part is that it doesn’t contain any added sugar!

As an Amazon Affiliate, I earn from qualifying purchases. If you purchase a product following my link, the price will not change, and I only recommend products that I use and love.

Supplies to Make Apple Butter

If haven’t read my post about my favorite canning supplies, I recommend taking a look for items that will make canning this apple butter easier!

I also highly recommend purchasing either a steam canner or the Ball freshTECH Electric Water Bath Canner and Multi-Cooker, if you are interested in another way to save stovetop space or if you have a glass stovetop and don’t want to put a heavy canner on top of it. I use it exclusively for anything I water bath can. The best feature of this canner is that is can easily hold 12-14 half-pint jars!

Recipe Video

How to Make Apple Butter with No Added Sugar

Recipe adapted from the National Center for Home Food Preservation recipe.

Instructions

  1. Core and slice 9 pounds of apples.
  2. Add apples and 2 1/4 cups apple cider or apple juice to a roaster or slow cooker and cook on medium high heat.
  3. Once apples are very soft and falling apart, strain using a food strainer.
  4. Add apple mixture to roaster or slow cooker.
  5. Add 1 cup sucralose (optional), 2 tablespoons cinnamon, 1/2 teaspoon ground cloves, and 1 teaspoon ground allspice to apple mixture in roaster or slow cooker.
  6. Cook until apple butter is a deep brown and the sugars have caramelized.
  7. Add additional apple cider or apple juice if needed to thin mixture.
  8. For a smoother texture, use an immersion blender to blend the apple mixture.
  9. Store apple butter in refrigerator or continue with canning instructions.
  10. Canning Instructions

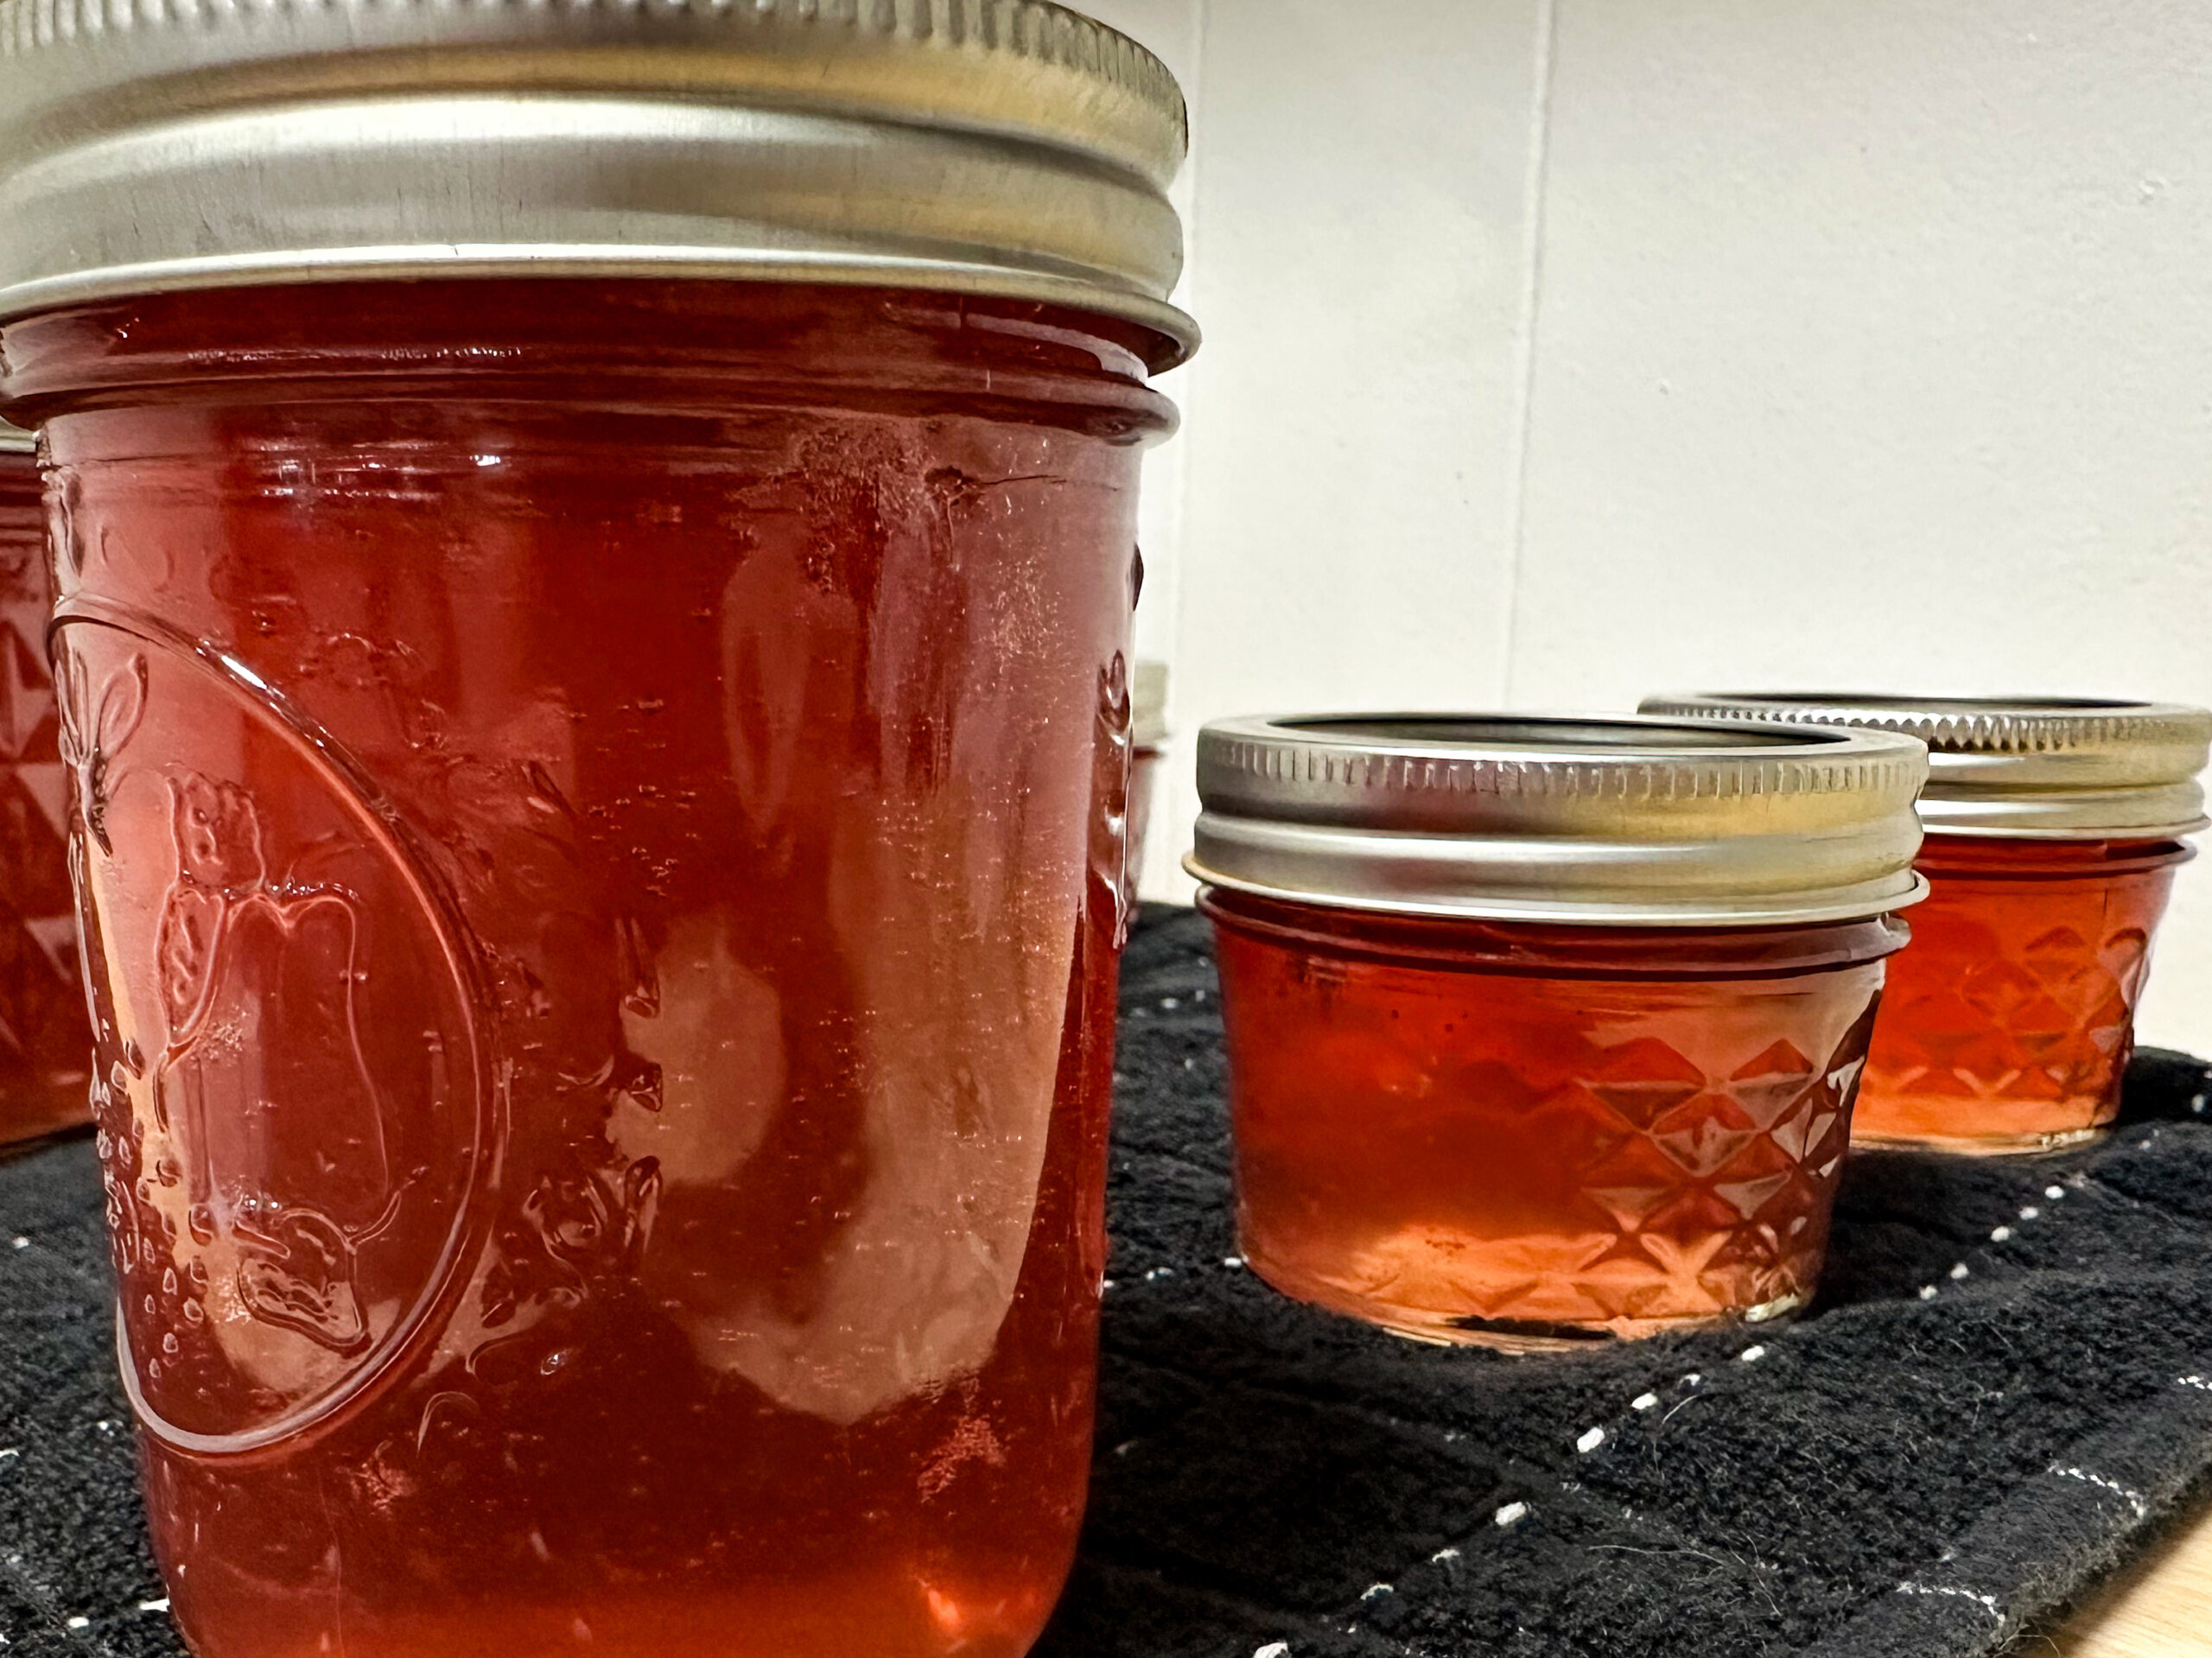
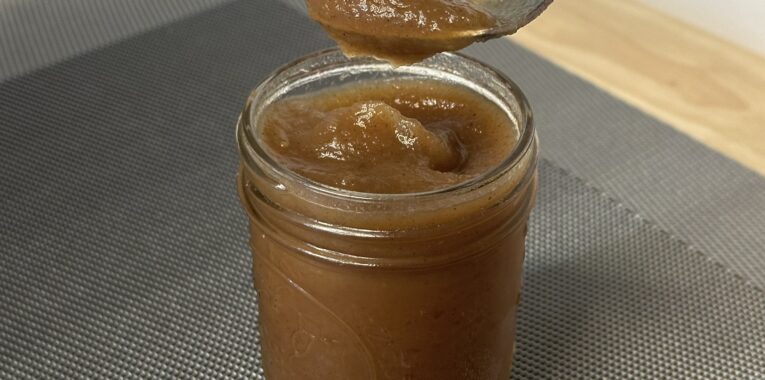
  11. Fill clean, warm jars with apple butter, making sure to leave 1/4-inch headspace.
  12. Debubble and double-check headspace. Add more apple butter, if needed.
  13. Clean jar rim off to ensure no apple butter is on it.
  14. Put a clean lid on and screw on band until fingertip tight.
  15. Put in water bath canner.
  16. Fill remaining jars until mixture is gone. About 10 half-pint jars.
  17. Water bath process for 10 minutes, adjusting for altitude.
  18. Remove jars and set on towel or wooden cutting board to cool for 12-24 hours.
  19. Remove bands and check seals. If any jars failed to seal, store in refrigerator and use first.
  20. Wash jars and store without bands on.

More Posts For You

Low Carb Peanut Butter Haystacks

These delicious, peanut butter haystacks are reminiscent of no-bake cookies! They are, in fact, no bake, low carb, and keto-friendly! Each cookie contains only 2.4 net carbs!

Ingredients

You only need four ingredients for these delicious peanut butter haystacks–butter, unsweetened peanut butter, unsweetened coconut flakes, and sweetener of choice! I used sucralose, but monk fruit and stevia would work just as well.

If you’re dairy-free, replace the butter with coconut oil. Make sure to use coconut oil that is solid at room temperature, as it and the peanut butter help solidify these cookies.

Recipe Video

Image of 3 mason jars filled with a red, clear jelly.

How To Can Red Bud Jelly

Red bud trees are in bloom, and it’s time to make Red Bud Jelly! Red Bud Jelly is a beautiful pink jelly with a sweet, light, almost-grape flavor. The hardest part of making Red Bud Jelly is carefully removing the blossoms from the stems. Once you have removed the blossoms, it’s a super easy, quick canning project! Check out my video below for a visual aid.

As an Amazon Affiliate, I earn from qualifying purchases. If you purchase a product following my link, the price will not change, and I only recommend products that I use and love.

Supplies to Make Red Bud Jelly

If haven’t read my post about my favorite canning supplies, I recommend taking a look for items that will make canning this recipe easier!

I also highly recommend purchasing either a steam canner or the Ball freshTECH Electric Water Bath Canner and Multi-Cooker, if you are interested in another way to save stovetop space or if you have a glass stovetop and don’t want to put a heavy canner on top of it. I use it exclusively for anything I water bath can. The best feature of this canner is that is can easily hold 12-14 half-pint jars!

Recipe Video

How to Make Red Bud Jelly

Recipe adapted from the University of Wyoming Cooperative Extension Service Dandelion Jelly Recipe.

Instructions

  1. Fill a quart jar with red bud blossoms.
  2. Cover the red bud blossoms with 4 cups of boiling water.
  3. Let cool, then set in the refrigerator overnight to steep.
  4. The next day, strain the red bud “tea” into a large pot or Maslin jam pan.
  5. Bring tea to a boil.
  6. Add 3 tablespoons of lemon juice and 6 tablespoons (or one packet) of pectin to tea.
  7. Bring mixture back up to a boil, then add 4 cups of sugar.
  8. Bring to a boil again, stirring constantly for 1-2 minutes.
  9. Store jam in refrigerator or continue with canning instructions.
  10. Canning Instructions

  11. Fill clean, warm jars with jelly, making sure to leave 1/4-inch headspace.
  12. Debubble and double-check headspace. Add more jelly, if needed.
  13. Clean jar rim off to ensure no jelly is on it.
  14. Put a clean lid on and screw on band until fingertip tight.
  15. Put in water bath canner.
  16. Fill remaining jars until mixture is gone. About 4 half-pint jars.
  17. Water bath process for 10 minutes, adjusting for altitude.
  18. Remove jars and set on towel or wooden cutting board to cool for 12-24 hours.
  19. Remove bands and check seals. If any jars failed to seal, store in refrigerator and use first.
  20. Wash jars and store without bands on.

More Posts For You

Image of a bowl with food. The food appears to be cauliflower, bacon, and eggs, topped with avocado slices.

Low Carb Breakfast Bowl

Whether you’re low carb or just trying to incorporate more vegetables into your daily eating, you can’t go wrong with this cauliflower breakfast bowl! It’s low carb, high protein, and it is absolutely delicious!

The Cauliflower

Cauliflower has grown in popularity in past years. It’s low carb and takes on the flavor of whatever seasonings you use. That’s why it works as “rice” or, in this case, faux-tatoes.

You can use frozen chopped cauliflower for this cauliflower breakfast bowl recipe, but I really recommend using about half of a fresh head of cauliflower so the recipe isn’t soggy or mushy.

The Bacon

I used real bacon bits in this breakfast bowl, but you can swap those out for turkey bacon, sausage, or any other kind of meat you prefer! Just cook the meat first, then remove it from the pan, so you can cook your onion and cauliflower in the leftover fat in the pan.

Recipe Video

Image is a black bowl with chili in it. The chili has diced tomatoes, ground meat, and butternut squash pieces in it.

Instant Pot Chili With Winter Squash

This keto, low-carb-friendly Instant Pot chili with squash is delicious and super easy to make! You can make it in the Instant Pot or on the stovetop. With only 12 net carbs per serving, this chili makes it easy to stay within your carb goals for the day!

Instant Pot Chili for the Entire Family

One thing I love about this recipe is that, if you’re keto and your spouse or children aren’t, you can separate portions and add beans to their portions for a more traditional chili! I love meals like this because I don’t have to prepare two different dishes for the same meal.

How to Customize

First, most winter squashes are delicious in this Instant Pot chili! Acorn squash, butternut squash, kabocha squash, and pumpkin are all excellent choices.

You can also customize the seasonings and meat that are in this chili! If you have a special chili spice blend, add that in place of the spices. For meat, use ground beef, turkey, or chicken. Textured vegetable protein is a great replacement for the meat if you’re vegan or vegetarian!

If you’re low carb, I would suggest serving this chili with avocado and cheese for some healthy fats.

Recipe Video

More Posts For You

Image of sliced zucchini on top of tomato sauce.

Low Carb, High Protein, Dairy Free Lasagna Recipe!

This low carb, high protein lasagna recipe is a great option for those following keto or a low-carb diet! It’s super high in protein, contains healthy fats, and is customizable to your unique diet and palate!

As an Amazon Affiliate, I earn from qualifying purchases.

Lasagna Pasta

This recipe uses a combination of zucchini “lasagna” and green lentil lasagna pasta. Following this recipe exactly gives you 22 net carbs per serving. However, if you’re looking for an even lower carb option, swap out the layer of green lentil lasagna pasta for a layer of zucchini lasagna, and that will lower the net carbs to 15.5!

If you’re new to low carb, I really recommend using the green lentil pasta because it helps with the transition. It also adds protein and structure to the lasagna!

How to Customize

You can customize the vegetables, seasonings, and meat that are in this lasagna! For example, I love adding mushrooms, onions, and red pepper flakes. You can use ground beef, turkey, or chicken. The options are practically endless!

What Is Nutritional Yeast and Do I Need It?

Nutritional yeast is a deactivated yeast. It’s a yellow powder that is dairy-free, sugar-free, gluten-free, and sodium-free! It’s also high in protein, fiber, and Vitamins B1, B3, B9, and B12 (or niacin). This is important when you’re on a dairy-free diet because, in a typical American diet, much of our B12 comes from dairy. Because it replaces cheese in this lasagna, I do recommend using it–otherwise, you just have a vegetable casserole!

More Posts For You

Image of 12 turnovers.

Sourdough Turnovers With the Easiest Filling

These delicious sourdough turnovers are easy to make and much better than store-bought! Because the filling is so versatile, this recipe is great for individuals on special diets, including sugar free, vegetarian, and even vegan–just make sure your crust is vegan.

Part of what makes this recipe so great is that the filling is your favorite jam, jelly, preserve, marmalade, or pie filling! It can be store-bought or prepared and canned at home by you! My family loves turnovers with my lower sugar orange marmalade, no sugar added blueberry jam, and apple pie filling or jam, but the possibilities and variations are truly endless.

Turnover Pie Crust

As I mention in my sourdough pie crust recipe, I prepare batches ahead of time and freeze them for a later use. Every Pi Day, which falls on March 14th every year, I set a prepared, frozen pie crust in the refrigerator to thaw so all I have to do is roll the dough out, add filling, and bake! Another reason I use sourdough pie crust is because sourdough has so many benefits, which you can read about here!

If you don’t have a sourdough starter or just don’t want to make pie crust, you can use pre-made pie crust or your favorite pie crust recipe.

More Posts For You

Image of apple pie and pumpkins on a white tablecloth.

Sourdough Discard Pie Crust

This sourdough discard pie crust comes together quickly and stores well in the refrigerator and freezer! I like making a double (or triple!) batch and freezing it for later use.

If I’m being honest, I don’t love making pie crust. I don’t like the feel of butter, and I really don’t like cleaning greasy butter off of dishes. But that’s what makes this method so great! I save up my discard so I can make a large batch. Then, I can make a couple of pies without having to deal with the butter mess to make another pie crust!

As an Amazon Affiliate, I earn from qualifying purchases.

Vegetarian Option

To make this recipe vegetarian, simply use plant-based butter!

Cold Butter, Cold Discard, Cold Water

The secret to deliciously flakey pie crust is cold everything. This keeps the butter from melting, which is what makes the flakes!

As I said before, I don’t like the feel of butter, so I use my 8-cup capacity food processor to grate it! Just attach the shredder plate and you can quickly grate your butter–mess-free! This also helps keep your butter cold because it isn’t melting all over your hands while you’re trying to grate it.

Why Make Pie Crust for Pi Day?

Another reason I like making a large batch of pie crust is because March 14th is Pi Day. For some reason, I tend to forget until–you guessed it–March 14th, and then I don’t have time to make pies to share with friends and family. But now that I have pie crust in the freezer ready to use at any given moment, I just set it out that morning and it’s ready to bake and share later that day!

In case you don’t remember from math class, pi is a mathematical term that represents the ratio of the circumference of a circle to its diameter. This number is 3.14159, or 3.14 rounded!

Honestly, math has never been my strong suit and the only reason I know March 14th is Pi Day is because it’s an excuse to make (and eat) pie! Now, there are some pi enthusiasts (i.e., math nerds) who think pie should only be served on Pie Day, which is on January 23rd, and not on Pi Day, which is March 14th. But, in my opinion, every day is a good day to eat pie! And every day is a great day to spoil your friends and family with a yummy, homemade dessert!

Recommended Products

I highly recommend using pie crust shields. This crust browns (and then burns) particularly quickly if the edges aren’t protected. I put the pie crust shields on before baking and take them off when I have about 10-15 minutes left so the edges can brown slightly.

More Posts For You

Image of corned beef, cabbage, and red potatoes on a white plate.

Nitrate-Free Corned Beef and Vegetables in the Instant Pot!

With Saint Patrick’s Day just five short days away, now is the time to start brining your corned beef! This recipe is requires just little early preparation and is cooked in the Instant Pot. It’s quick and easy and cleanup is a breeze, with all of the cooking being done in one single pot!

Image is of cabbage, corned beef, and a potato. Lettering says, "Instant Pot corned beef & cabbage, JamminandCannin.com".

Why Make Your Own Corned Beef?

The decision to brine my own beef instead of buying it from the store came about once I did a deep dive into nitrates. Sodium Nitrate is a preserving agent used to prepare most corned beef that you can buy in the store. It’s also what gives corned beef that bright pink color. Studies show that consuming sodium nitrate may be linked to cancer (and another link), kidney abnormalities, heart disease, thyroid issues, and diabetes.

While some people prefer the pink color, I won’t miss it. And I don’t mind preparing a brining solution a few days in advance to avoid the potential risks of sodium nitrate!

Recipe Video

Other Posts For You

Image of a jar containing fermented cabbage or sauerkraut. An un-pictured individual is holding a fork above the jar with some sauerkraut on it.

Easy Homemade Sauerkraut

It’s almost St. Patrick’s Day and that means cabbage will be going on sale at grocery stores! This is a great opportunity to purchase a couple of extra heads of cabbage and make sauerkraut! Homemade sauerkraut can be canned, but it can also store in your refrigerator for months. I prefer to store mine in the refrigerator if possible to avoid heating and potentially killing the naturally-occurring probiotics.

Why Make Homemade Sauerkraut?

Homemade sauerkraut differs from store-bought in three important ways:

  1. Pasteurization/canning – most store-bought krauts are treated with heat to eliminate bacteria culture before being canned and are heated during the canning process. Both of which compromise the naturally-formed probiotics that make sauerkraut so good for you to begin with!
  2. Preservatives – synthetic preservatives (i.e., chemicals) that are added into foods have been linked to heart issues and other health concerns.
  3. Pickled vs. fermented – another thing to watch out for in store-bought sauerkraut is sauerkraut that isn’t actually fermented but is pickled instead! The ingredients in a fermented sauerkraut should be cabbage, salt, and maybe water, but definitely no vinegar.

Because sauerkraut is so easy to make, you won’t go back to store-bought!

As an Amazon Affiliate, I earn from qualifying purchases.

What Do I Need to Make Sauerkraut?

You will need jars, lids, cabbage, salt, a tool to tamp the kraut down, and a weight that will fit into your jar(s).

  • Stainless Steel Sauerkraut Tamper – I love this tamper! It is stainless steel, so it won’t retain flavors or harmful bacteria and is dishwasher safe! You can also use a wooden spoon to tamp the kraut down, but I really recommend investing in a tamper.
  • Lids for wide-mouth jars – Standard, two-piece mason jar lids will work, but you will need to open your fermenting jars daily to “burp” the jar and allow the fermenting gases to escape. That’s why I like using lids designed for fermenting! I can truly set-and-forget because the lids will allow gases out without allowing contaminants in.
  • Weights for wide-mouth jars and weights for regular-mouth jars – If you’re packing your sauerkraut into a wide-mouth jar, you can use a clean, water-filled, quarter-pint jar to act as a weight. However, if you’re using a regular-mouth jar or if you’re going to be fermenting very often, I really recommend purchasing weights designed for fermenting. They’re so easy to use, easy to clean, and don’t require using a jar that you could be canning in!

Recipe Video

Instructions

  1. Remove outer cabbage leaves, reserving a couple. Wash the reserved leaves and the cabbages well.
  2. Chop 5 pounds of cabbage into chunks that will fit in your food processor chute.
  3. Attached your shredding plate to your food processor and shred all 5 pounds of cabbage.
  4. Add cabbage to large bowl.
  5. Sprinkle 3 tablespoons of canning and pickling salt onto cabbage.
    NOTE: You can use any salt you have on hand–just make sure it isn’t iodized and doesn’t contain any anti-caking agents.
  6. Massage the salt into the cabbage until the cabbage begins producing a liquid.
  7. Let sit for 15 minutes.
  8. After 15 minutes, pack cabbage into glass mason jar(s).
  9. Using a pounder or tamper, tamp down the sauerkraut after a few handfuls to ensure it is well-packed and does not contain any air bubbles.
  10. Fold the reserved cabbage leaf to about the size of the largest part of your jar and pack it on top of the shredded cabbage.
  11. Place a weight on top of the cabbage leaf to keep it and the shredded cabbage under the brine. You may use a glass weight, like the one linked above, or fill a clean, quarter-pint jar with water to act as a weight.
  12. Screw on a lid of your choice and let sit on a countertop for 7-10 days.
  13. If you’re using a two-piece lid, unscrew the lid to “burp” your jar every day to ensure gases don’t build up. If you’re using a lid designed for fermenting, you can let your jar sit undisturbed.
  14. After 7 days, remove the lid, weight, and cabbage leaf and taste your sauerkraut.
  15. If the taste is to your liking, can according to the instructions in your canning book or on the National Center for Home Food Preservation website or store in your refrigerator.
  16. If you prefer a more sour kraut, put the cabbage leaf and weight back in, put the lid on, and let sit out on your countertop another 7-10 days, tasting every 3-7 days until desired taste is reached.

More Posts For You